Wednesday, 26 September 2012

Aussie 3 Minute Miracle | Competition


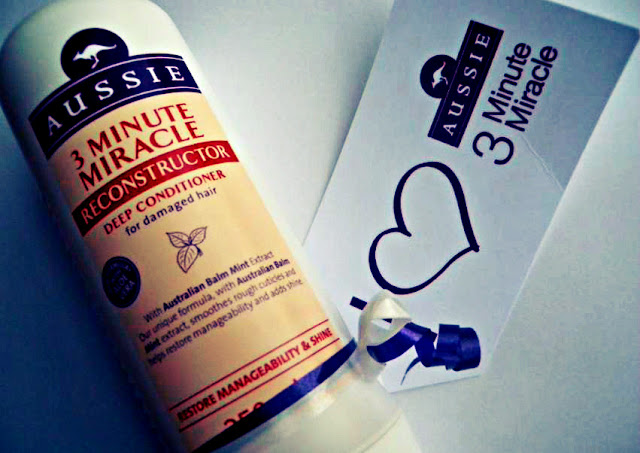
Hi beauties, as you all know I am in love with Aussie Hair Care and think it should be every girls secret to having fabulous, gorgeous hair. One of my go to Aussie products has to be their 3 Minute Miracle Deep Conditioner* which will make your hair smooth, shiny and smell extremely delicious! As an Aussie Angel perk, Aussie recently sent out the recondstructor 3MM which has been working wonders on my heat damaged hair. It's wonderful formula has really helped sooth my hair and helped to iron out any kinks. Whats great about the 3MM is that its a deep conditioning mask for your hair, that will only take 3 magical minutes to transform your locks, making pampering, a quick and easy part of your hair care routine... Of course there is nothing stopping you from leaving this on longer than 3 Minutes.

Aussie are kindly giving 10 of you beauties to get your hands on some of your own 3 Minute Miracle and the chance to win an aussome Aussie Hamper just by following these two simple steps.

1. Tweet Aussie @Aussie_Hair_UK using the hashtag #3MinuteMiracle and they should send you out a  mini 3MM to try... Simple! I would love it if you beauties could also include me in your tweet @sunshinesprkle so I know that you have entered.

2. Post any images online (Pinterest, Twitter, Facebook and Instagram) of what you think 3 Minute Miracle means to you and tweet Aussie the link using the #3MinuteMiracle hashtag and this will enter you into the competition to win Aussie Hamper Surprise!  

The images can be of anything that you feel is related to your hair and 3MM, Aussie love a bit of creativity so get creative lovelies!

Below are images which show what 3MM means to me!


Have fun entering the competition, and good luck!


*You must be 18 or over to enter this competition and be happy for Aussie to contact you
** Aussie are responsible for sending out all the prizes as they are the ones who are hosting the competition. Competition closes on 05.10.2012

Share:

Sunday, 23 September 2012

Barry M Chameleon Nail Pain | NOTD Review


Hi ladies. A little while ago I was sent the Barry M Chameleon Nail polish in the shade Lilac from the lovey Charlee as part of a beauty blogger swap. If you've not checked out her blog yet, you can do so here. So seeing as its Sunday and the weather is miserable, I thought it would be a good idea to stay in and do a quick and easy NOTD post for you. 

For those of you who don't know, Barry M released the Chameleon Nail Paints a little while ago, which are beautiful metallic shades of nail polish. However as soon as a clear top coat is added, the nail polish will instantly change colour, which makes these nail paints a little extra special. This magic changing colour nail polish makes nail art easy for beginners and makes for a fun nail polish to have in your collection.

If you love metallic finishing nail polishes, then you will instantly love this lilac shade on its own. It only needs one coat for a nice even look on your nails and once on your nails its the most beautiful lilac shade which has a glittery, sparkly undertone to it, with a foil like finish. I'd be quite happy to wear this polish just on its own and I think it will be perfect for the colder months as its a very 'wintery' looking polish, the words 'Snow Queen' come to mind when I wear this on it's own. 

However the magic really happens when you add your clear top coat to the dried lilac shade. As soon as the top coat is applied the metallic lilac shade will change colour and become this deep, royal purple, which has a 'jelly' like look to it. Unfortunately my camera and the lighting I had today failed to pick up the true colour of this deep purple, but if I had to describe it, I would have to say it reminds me of the 'Cadbury's' colour purple. 

You could transform your whole manicure with the application of a topcoat to and wear the deep Cadbury purple shade on your nails, or you could get creative with some little nail art designs as I have done. Stripes, spots and french manicure tips will work really well as a nail art design when using the Chameleon polish and it really does make nail art easy. The only thing I would suggest if you are wanting to do detailed nail art with this polish, is to use a clear top coat which has a thin brush as this will make doing your designs much easier. 

Overall I love this polish and I am definitely wanting to get my hands on the other shades, I believe there is a pink and blue one. If you are wanting to get your hands and give this polish ago you can find it at Boots which retails at £3.99. If any of you beauties have tried the other shades I would love to know your thoughts on them. 


Please excuse the state of my nails, they are cringe worthy I know, but work and the cold weather have not been kind too them. I am looking for something to help with cuticles, do you beauties have any good recommendations?

Share:

Saturday, 22 September 2012

Revlon Photoready Foundation | Review


Hi beauties. Recently that time came around where my favourite high end foundation ran out, Clinique's Stay-Matte Oil Free Foundation and it was time for a new purchase. However as I am trying to save the pennies and the pounds, I was after a good drug store foundation to try. I had heard so many good things about Revlon's Photoready foundation that I decided to give it ago. 

As a lot of you will know I have oily to combination skin and therefore I can be a little particular when it comes to finding the right foundation, lets face it no one wants to walk around with a shiny face, even with all the powder in the world! One thing I had read about the Photoready foundation is that it is oil and fragrance free, which can only be a plus for us who do have the odd oily T-Zone area or sensitive skin. It also has SPF 20, which is not something I look for in a foundation, but if its got it in, then that a bonus too. 

So far I have been using this foundation daily for just over a week and I can honestly say its one of the best drug store foundations I have tired in a long long time. There is so much about the Photoready foundation which I have fallen in love with. To start off, I love the packaging, I know this doesn't make a great foundation...But I love quality in my makeup buys and this foundation has a very sleek look to it, in its glass bottle. The foundation dispenses though the use of a pump, which makes things more hygienic and more importantly allows you to have more control with the amount of foundation that will come out. For those wondering I picked the shade 008 in Golden Beige, which is slightly on the darker side for my skin tone, but I prefer that in a foundation anyway. 

As for the actual foundation itself, I find that it applies like a dream. The foundation is really light weight, and a little really does go a long way, which means that this product will last you a long time. It's lightweight formula makes blending this foundation into the skin really easy. Personally when picking a foundation I like to have a full coverage, and although this is a light weight foundation it does give you a good medium to full coverage. Its lightweight formula allows you to build up this product for a more full coverage look without it looking too 'cakey' on your face. I love how it will easily hide any redness in your skin or any hyper-pigmentation, creating an even skin toned look.

It's hard to tell from the swatches below, but Revlon's Photoready Foundation does have a slight shimmer finish to it once applied, creating a healthy dewy look on your skin. For those wondering, this is because the foundation has photochromatic pigments in which help to reflect the light which help to make your skin look flawless and radiant. When I first started using this foundation I noticed that it gave me a mixture between a matte finish and a dewy look and my immediate thoughts were 'OMG this foundation is just going to be sliding off my face by the end of the day'. Much to my surprise it didn't and in no way made my skin feel oily or add too much shine. I would't go as far as saying I would wear this foundation without a good powder... but one touch up with powder throughout the day will keep any shine at bay, especially if you have a similar skin type to me. Girls, those of you who have dry skin will love this foundation as it in no way feels drying on your skin either. 

Overall I love this foundation and I know that I will be making a re-purchase once it has ran out. It is a little more on the expensive side as far as a drug store foundation goes, retailing at £12.99 (from Boots), but for those wanting to give it ago, it's only £9.99 from Boots and you can find the link here. I honestly think its worth the money as I can see this lasting me a long time and I really like the overall look of it once it's applied.


I am always on the hunt for new foundations and would love to know your best recommendations ladies!


Share:

Friday, 21 September 2012

MUA Pro Mosaic Bronzer | Sunkissed Glow


Bronzer has always been a makeup essential for me, one which I apply everyday without fail; whether it's used for contouring or just adding an all over glow. Recently I took part in a Beauty Blogger Swap (post here) with the lovely Charlee from MyStringaling Blog and received the MUA Pro Bonzer in shade 2 Sunkissed Glow.

This Mua Bonzer is so pretty on the eye with the array of different shades, which have been put together in a Mosaic pattern; with shades ranging from dark bronzes, sandy highlights and pretty peaches. Some of the peach shades even have the odd hint of shimmer undertones too them which gives this bronzer that sunkissed  look. Whilst each mosaic section is probably a little on the small side to use as an individual bronzer, they are small enough to use as eyeshadow. When you mix all the shades together with your brush, the most gorgeous bronze shade is created, one which would suit all skin tones, even those with fair skin. 

The MUA bronzer has a matte finish to it and is extremely pigmented,especially when built up on your brush. With just one light sweep across the bonzer will give you a light, gorgeous sunkissed glow, which is perfect for an all over look. Not only does this bronzer work well at giving you a little colour, but will look lovely and work fabulously as a contour. It's the peach shades within this bronzer that are the ones that make this one a little extra special as they create a lovely warm glow to the overall shade, making the name of this bronzer 'Sunkissed Glow' is very fitting.

As we all know and love MUA make makeup really affordable and this is another product which has a small price but great quiality. I find the staying time of this bronzer last your whole makeup wearing day, as long as you use a good foundation and primer. I tend to top up just  the once on my lunch break and it will carry me though till the end of the day.

Not only is the  Mosaic Bronzer affordable, but when using it, I find that it blends really well into the skin and has a pleasant smell to it. Overall I just love how pretty it looks and as I am one who normally opts for a darker bronzer, its lovely having this warm peachy one added to my collection. You can purchase Sukissed Glow from the MUA website here.


Share:

Tuesday, 18 September 2012

Maybelline 24hr Colour Tattoo | On and On Bronze


Hi Beauties. I must be the last person in the entire blogging world to get my hands on the much hyped and raved about Maybelline 24hr Colour Tattoo Eyeshadows. I finally decided to cave in and give one ago the other week whist they were on offer in Boots. Like everyone else and all the reviews I have read, I have found that I have fallen in love with these little pots of metallic loveliness and they are definitely worth having in your makeup collection. Now I know there must be loads of reviews out there on these little beauties, but I thought I would give you my opinion on them as it might make you re-kindle your love with yours again or you may have missed the boat just like me and not tried one yet; so this little post maybe the deciding factor for you.

So while I was in Boots, I decided that it was necessary to swatch every single 24hr Colour Tattoo shade that they had out on the stand and after all that swatching I decided to only purchase one which was the shade 'On and On Bronze'. This shade has to be the most beautiful and most wearable out of the lot; I love wearing bronze/golds and browns on my eyes, so this shade suited me down to a T! 

On and On Bronze has gorgeous pigmentation and the colour is just divine. As you can see from the swatches its a gorgeous bronze, with gold/champagne undertones to it and for those wondering, it dries with a frost finish. It's easily applied using the tips of your fingers and will glide smoothly and evenly onto your eye lids. One thing I have loved about the Colour Tattoo has to be the fact that its very buildable and if you use a light hand you can get a softer metallic shade or go the other end of the scale and wear a much more dramatic eye with using more product. As the name of this product suggests, its supposed to last up to 24hrs once applied. Now I've have not been able to test this statement just because I don't wear my makeup for this long; But what I can say is that every time I have worn this, I've had no creasing on the eyes and its stayed put. This shadow also makes a great base in which to apply powdered shadows. 

For those of you who have wondered why I've put off getting one 24hr Colour Tattoo's for this long, is because I've found in the past that I don't really get on with any creme based eyeshadows. This is just because I have extremely sensitive skin, especially around the eye area and have found in the past, I've had a lot of bad reactions (swelling, redness and dry skin around my eyes) when using a creme based formula, so I was a little worried about trying these. The only creme based eyeshadows I do get along with have to be the Mac Paintpots. However I thought the Colour Tattoo was worth a try just because they are so pretty and I had a 'what the hell' moment and thought id just go for it and try it. Thankfully I had nothing to worry about at all as the Colour Tattoo didn't irritate my skin in any way shape or form and I was able to to wear it like any other person... Good result!

Overall I am over the moon I bought the 24hr Colour Tattoo which is so affordable at £4.99  from Boots and as its been my recent go too eyeshadow. I am keen to add some more shades to my collection and have  got my eye on 'Permanent Taupe' and 'Eternal Gold', but I know that Maybelline have realised more shades of the Colour Tattoo in the US, so I am hoping that they will be released over here very soon. 


Share:

Sunday, 16 September 2012

Curly Wavy Hair Tutorial featuring Halo Hair Extensions


(Image I posted of Instagram)

Hi Beauties! In the week I posted a few pictures on Insagram of my hair when I had styled it curly and wavy and I recieved a lot of compliments and asks on how I achieved this style as well as a few requests to do a tutorial on it. Now the best way for me to show you would be to film a video, probably much easier and quicker... However I'm not brave enough to pop myself on film yet, so thought I would try my best to show you girls how I did it though a step by step guide and lots of pictures. Hopefully it will help you create a similar look, or give you a little inspiration for your own hair... Hope you enjoy this tutorial and if you have any more questions on hair please feel free to ask me in the comments below.

Step 1

Start by pinning a large section of your hair up around the crown of your head. It doesn't have to be neat, it's just so you can easily work with the bottom layers of your hair. Once pinned into place with a hair grip or hair bobble, you will want to tease and backcomb these bottom layers to add some volume. This is the section of hair where I find you can really add some volume and you can get away with it looking slightly messy as the top layers of your hair will cover it up. Once you have backcombed this section of your hair, take your hair straighteners or curling wand and curl the ends of your hair; running your fingers lightly though your hair once curled will help to loosen and separate the curls. Once you are happy set your hair in place with your favourite hairspray

Step 2

This step is completely optional, but here I have added my 'Halo Hair' extensions to add length and much needed volume. If you have thin hair, then hair extensions would be perfect for you as they really create the illusion of much thicker and fuller hair. If your wanting to find out more about hair extensions or Halo Hair you can check my review post on them here.

Step 3

Next you will want to curl the hair extensions that you have applied. If your not adding hair extensions, try bringing down the next section/second layer of your hair and repeat step one; teasing and curling this section of hair to add more volume.

Step 4

Here you will want to let the remainder of your hair down so you can curl the rest of it. Take smaller sections of hair for tighter smaller curls and larger sections for a loose wave;  Alternating between the two will create different textures in your hair making it look thicker and fuller.

Step 5

Lastly you will want to take your brush that you used for backcombing your hair, lift up the top layers of your hair and lightly tease underneath the hair to add a little more volume. This is also a great time to tease any of the underneath sections of your hair for extra volume or to touch up on any areas that you may have missed. Once you are happy with how your hair looks apply as much hairspray that is needed to hold your hair into place, and there you have it.. A curly, wavy hairstyle that has some volume and texture. 

Top Tips

Always use a heat protector spay before using any heat on your hair.

Even with hair extensions, my hair is still pretty thin and this means the curls and waves are likely to drop out as the day goes on. I carry a sea salt spay with me and give my hair a spritz and scrunch by spraying the procut into the ends of my hair which can create more of a messy beach wave look.

This look will look different each time I do it, if your curls are not going how you want them too; make them effortlessly messy by teasing your hair a little more.


I hope you enjoyed this tutorial girls and if there are any questions you have or any other looks you would like me to try, then please let me know.


Share:

Wednesday, 12 September 2012

Pretty Little Lockets | Vintage Jewelry


Recently I've been wearing these two items of jewelry which have been stashed away in a jewelry box since the beginning of the year. When my sister and I last took the long road up north to see my nana, she each gave us one of her lockets and earrings. There was no reason in particular, other than she was ready to pass them down to us. Since I was little I always remember my nana wearing this locket as it always had a picture of my sister and I in; I remember I would sit on her lap and say magic words to open it! As you can see the pictures in the locket are two young girls (my sister and I), but before we took the limelight I know it previously had pictures of my dad when he was a boy and a group family picture.

I was so touched when my nana gave me this and the pair of earrings as I know that this is something my Grandad bought for my nan just after they got married which was well over 60 years ago now. Sadly my grandad isn't with us anymore and I love that I have this little gift that he once bought my nana.

Now like I said I've kept these two items well hidden away for best part of the year, mainly because there is the fear in me that I will end up breaking or loosing them. But I was going though all my jewelry the other day and thought why not wear it? After all my nana used to wear this everyday and it's still in one piece. Now I don't really know what classes as official vintage just because I am fairly modern girl who buys things brand new (I am slowly trying to move away from this). But as these are so old I like to class them as a little bit of vintage, would you agree?

I have been pairing these two items with loads of different outfits and if you follow me on Instagram (sunshinesprkle) then you may have seen them featured; I wore the necklace on my most recent OOTD post which you can see here. These have been my 'go to' jewelry pieces over the last week, so expect to see them featured in a few more outfit posts.

Do you have anything that's been passed down to you that you love wearing? I would love to know beauties and your thoughts on what you would pair these little lockets with.


Share:

Tuesday, 11 September 2012

Montagne Jeunesse | Four Week Regime - Weeks 2 & 3


Hi Beauties, the other week I posted about the four week regime from Montage Jeunesse and thought that it was time to give you all an update with how I got on with weeks two and three, and let you know how my skin has benefited. If you would like to find out more information on this four week regime then you can always check my first post out here.


So week Two was the Cooling Cucumber Peel-Off Masque, which aims to remove dead skin and to help those problemed areas such as theT-Zone area. Montagne Jeunesse say:

'With juiced cucumbers and full of citrus goodness, this refeshing masque removes dead skin and impurities to revive your skin complexion as you peel the day away'

I have to say when I used this masque, my skin wasn't at it's best and it definitley felt as though it needed reviving, so I was pleased to be giving this ago. Upon opening the packet, there is a strong smell of cucumbers, which is a smell I'm rather fond of, just beacuse it smells so refreshing. The actual masque itself has a gel like consistency, which dries very quickly once you have applied it on your face. As with any peel-off masque you feel your whole face tightening as soon as the gel starts to dry. 

Montage Jeunesse recommend that you leave the masque on for 10-15 minutes, which is the perfect amount of time for this masque, any longer you will find that it will start to peel off on its own accord. Whilst the masque was applied, I found that the smell wasn't too overpowering and was kind to my sensitive skin. When it came to peeling it off, I have to say I did find it a little difficult as the masque does not peel off in one clean sweep, but is still easily removed. 

I love when you peel off the cucumber masque, as it really does feel as though you are taking away any impurities in your skin and I found that my skin was a lot smoother once the masque was removed. I also found upon inspection, that my pores were noticeably smaller. However I wouldn't go as far to say this masque is a cure for making your T-Zone perfect, but it definitely helps remove any nasties, whilst being refreshing all at the same time. Overall I enjoyed this face masque and would use it again.


When week three came around, it was time to cleanse and tone my skin with the Montage Jeunesse Iced Crystal Masque, which has to be the best face masque I've ever tried from this brand. Montagne Jeunesse say:

'As the temperatures go up, cool things down with the exhilarating Iced Crystal Masque; an exfoliating facial infused with cooling spearmint to cleanse and tone skin. Dead sea salt to improve impurities and sweet almond and Jojoba oil to hydrate the skin leaving it soft, smooth and cleansed'

The smell of this masque smells exactly like spearmint, and it feels so refreshing once applied to your face. Because of the infused mint, I found it does create a little tingle sensation once it first goes on. I love how this masque has also been filled with dead sea salt and as the name of this masque suggests the salt 'crystals' create a gentle exfoliation when you apply and massage it into your skin. The masque dries fairly quick and again you get that tightening feeling as the masque starts to dry. 

The masque goes on blue, but dries fairly clear, and when it comes to washing it off, I found that it the dried masque lathers up a little which is where the gentle cleanse comes into it. Onced I had finished using the Iced Crystal Masque, my face felt soft and smooth and my skin looked as though it was glowing. I loved everything about this masque and was over the moon that from one packet I was able to get two good uses out of it. If you were going to try any face mask from Montage Jeunesse the Iced Crystal one would be the one that I would recommend. 

Each masque retails at £1.09 (RRP) and if you are wanting to get your hands on any Montage Jeunesse products or one of the two masques I've mentioned then you can find them on the Montage Jeunesse website here

http://www.montagnejeunesse.com/face-masks 

If your not wanting to order online, Montagne Jeunesse face masks are now available nationwide in retialers such as Asda, Superdrug, Tesco, New Look and Morrisons. Like always beauties, all Montagne Jeunesse products are vegetarian approved, paraben free and made from natural ingredients and the company are very proud of it's great ethos for  ‘Conservation of Energy, Protection of Animals and the Environment.’

Next week I shall be trying out Montagne Jeunesse's Very Berry Masque which will be the final one in this four week beauty regime, I will be sure to let you beauties know how I get on.


Share:
© Miss Sunshine and Sparkle | All rights reserved.
Blogger Template Designed by pipdig